According to Edison Research, 44% of people ages 12+ have listened to at least one podcast in their life. The fastest growing medium is podcasting and in today’s world, anyone can be in the broadcast business through podcasting. But, how do I get started?
When starting a podcast it can be overwhelming deciding what you want to talk about, who you want to talk to and how to get started.
- What kind of equipment do you need?
- Do you have professional production or do you bootstrap it yourself?
- Do you have guests or call-ins?
- Will you be doing the podcast with other hosts in different locations?
- Where will you house your podcast?
- What else do you need to be successful right out of the gate?
We’re here to help you tackle this overwhelming list of questions and learn how to start your own podcast.
First, we will start with a few basic questions to help drive your setup. We will then address some background information and finally, focus on the equipment you need to deliver the best possible podcast.
Podcast Setup 101: Development
First, ask yourselves these questions and write down your answers.
- Who is the host(s)? If there are multiple, are they in the same physical location?
- Do I want to host guests?
- Am I streaming the podcast live over social media?
- Do I want to take live callers?
- Do I want to monetize my podcast?
- How am I promoting my podcast?
- Where am I hosting and sharing my podcast?
- Am I able to edit or learn to edit this, or do I need help? We said no, we use Phil.
Now that you have those answers, let’s address some information we picked up along the way that would have been useful to us upfront.
Setup for success, internet goes out, computers glitch and things die.
Our number one rule during setting up was to make sure that the content was always protected. There are many platforms that let you record your podcast directly into their interfaces.
The problem is that many of these systems are computer driven and reliant on a network connection. Both of which will die when you need them. Don’t believe me, check out these reddit threads about losing podcasts.
We setup to have multiple recordings of the podcast and most importantly at least one that is sans computer.
Not all sound sources are the same.
There are what are know as balanced and unbalanced feeds. Who knew, right? Well, you need to because it will affect the sound quality. Learn all you need to know about balanced and unbalanced audio from PS Audio.
Take a minute to learn about phantom power. You will be glad you did, I wasted 1/2 a day troubleshooting and realized I never engaged the phantom power setting on my recorder.
Just because a connector fits, doesn’t mean it’s compatible.
We learned this the hard way after we purchased an XLR to trs cable to connect our microphone to a digital recorder. What we found was that each end of the cable was looking for a different type of signal. One side was balanced and the other was unbalanced.
We use XLR or 1/4″ whenever possible.
They are more consistent in their quality and connection. We do have to rely on some 3.5mm connections in our setup, which leads us to understanding the difference between TRS, TRRS and TRRRS connections.
We had terrible feedback in our first trials which ultimately traced back to our beats headphone cable. They are TRRRS connectors, which allows the mic feature to work, which were sending feedback into our system because the jack it was plugged into was not setup for TRRRS.
You can also find out more than thought you’d ever need to know about 3.5mm connections from Curtis Judd.
Make sure to keep these facts in the back of your mind:
- Most 3.5mm Y connectors are designed with a mic and headphone jack. Make sure you get a dual 3.5mm jack.
- Keep your cable runs as short as possible.
- Content brings you listeners, but the quality keeps them there.
- Record each source on it’s own track. This makes a difference in editing.
Podcast Setup 101: Setup
Now for the fun stuff. Let’s focus on the physical equipment to make it all happen. We are going to focus on our setup, because it is what we know best. We will however include some information on alternative options we explored.
Podcasting Recording
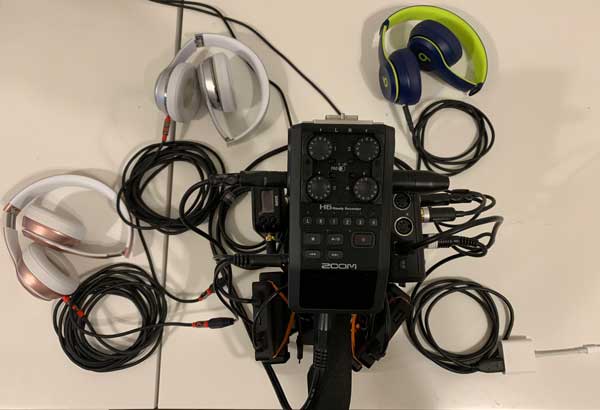
We are starting with this one, because we believe it is one of the most important components. You can record your podcast over the internet through Zencastr, Ringr, Skype or even QuickTime, but we strongly recommend you record everything locally.
Recording locally provides you the cleanest uncompressed audio possible and limits the opportunity for your episode to get lost or sound overly digitized. We recommend the Zoom H6 because of the build in mixer and onboard level controls.
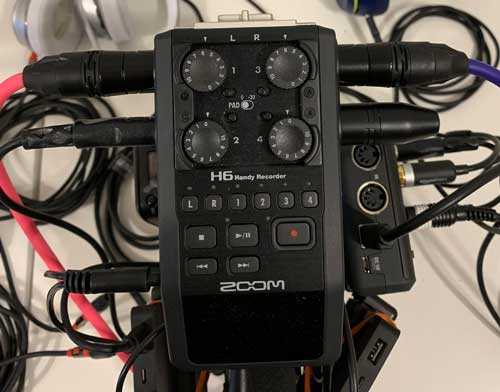
- Entry Level Digital Recorder – Zoom H4N PRO Digital Multi-track Recorder
- Advanced Level Digital Recorder – Zoom H6 Six-Track Portable Recorder
- Professional Level Digital Recorder – Zoom H6 Six-Track Portable Recorder with Zoom EXH-6 Dual XLR/TRS Capsule
- You can power your Zoom digital recorder with batteries, but we recommend connecting to a power source with an Amazon Basics Mini USB adapter.
Podcasting Microphone
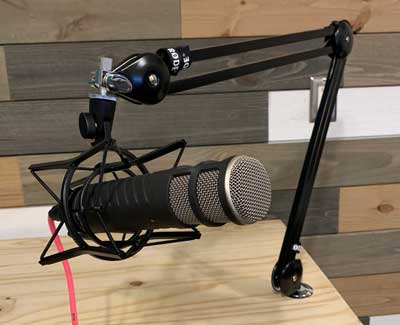
We chose to use an XLR mic in our setup because we felt the quality was more consistent and it gave us increased flexibility in our setup for the source audio. We use the Rode Procaster Mic below and have a Shure SM58-LC for live guests.
Here are some additional options:
- Entry Level Mic – Shure SM58-LC Cardioid Dynamic Vocal Microphone with Shure A55M – Shock Stopper and Shure A58WS-GRA Foam Windscreen.
- Advanced Level Mic – Rode Procaster Broadcast Dynamic Vocal Microphone. Rode PSM1 Shock Mount and PSA1 Swivel Mount Boom Arm. Our Microphones are connected to our digital recorder with a LyxPro Balanced XLR Cable.
- Professional Level Mic – Shure SM7B Cardioid Dynamic Microphone. This microphone requires some additional hardware, Cloudlifter CL-1 Microphone Activator, to fit into your rig.
Podcasting Headphones
We use the Beats Solo 3. Not because we feel they are better than anything else, but because they were free when we got our Macbooks. Thanks, Apple. Earbuds will work, but we recommend getting over ear headphones.
We connect these to our Zoom H6 Digital Recorder output with Monster® Auxiliary Stereo Audio Cable 12ft from Walmart and a Dual 3.5mm jack from Insignia.
Podcasting with a local co-host or guest
Simple. Duplicate your host’s setup and utilize the additional audio inputs on your digital recorder. If you do not plan to have too many local guests you can cut back on the budget in building this second setup. We went with the less expensive Shure SM58 and a table top mic stand and cut our setup cost in half.
Podcasting with a distant co-host or guest
RINGR. As we addressed previously, you want to have local uncompressed recordings and you do not want to lose what you have because of a network outage. The RINGR setup is straightforward and easy to use.
Even more importantly, it will record a local copy of the guest or co-host and then upload that uncompressed file to your account. This gets you audio hat is as close to you being in the room with them. Our guests have used speaker phone, their computers or just earbuds and a mic and all have come in great.
Take a listen to Kristina Kuzmic on one of our episodes of Take it or Leave it.
Here is the equipment you need to set this up:
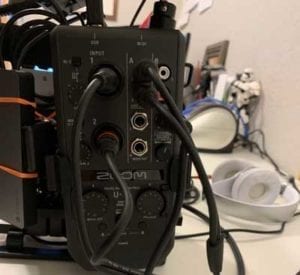
- Digital Audio Interface – Zoom U-24 Handy Audio Interface and Audio Interface Holder.
- UGREEN USB Audio Adapter External Stereo Sound Card with 3.5mm Headphone and Microphone Jack for Windows, Mac, Linux, PC, Laptops, Desktops, PS4 (Black)
- Hosa CMS-110 3.5 mm TRS to 1/4″ TRS Stereo Interconnect Cable, 10 Feet
- AmazonBasics 3.5mm to 2-Male RCA Adapter Cable – 8 Feet
- You can power your Zoom digital audio interface with batteries, but we recommend connecting to a power source with a Micro USB adapter.
Podcasting and Broadcasting Live
Live streaming your podcast helps increase your exposure and adds another dimension to you show and setup. Be sure to setup properly so your live viewers, co-hosts and guests can all hear each other in real time. Do not rely on your phone’s microphone to pick up your audio, because it won’t deliver as well.
SwitcherStudio broadcasting software is an optional component that we use to provide overlays and sponsor art during our live broadcast. You can simply connect the Apple Lightning to USB3 Camera Adapter to your phone to use it as a source.
Podcasting with Live Callers
This is cool. It provides an opportunity for your listeners to really get invested in the show. Here’s how we do it. Get a Google Voice number and get setup in Google Hangouts, make sure you pay attention here because Google is making changes to their Hangouts and Voice platforms.
Here is what we used to get our setup:
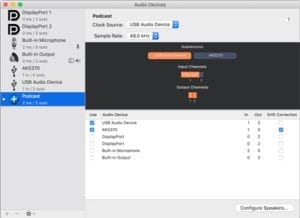 Important Note – you will need to setup an aggregate audio device on your computer so that you can have someone screen the calls. By setting this up, you can have someone receive the caller and confirm their information before patching them through to the host(s).
- Digital Audio Interface – Zoom U-24 Handy Audio Interface and the Digital Interface Holder.
- UGREEN USB Audio Adapter External Stereo Sound Card with 3.5mm Headphone and Microphone Jack for Windows, Mac, Linux, PC, Laptops, Desktops, PS4 (Black)
- Hosa CMS-110 3.5 mm TRS to 1/4″ TRS Stereo Interconnect Cable, 10 Feet
- AmazonBasics 3.5mm to 2-Male RCA Adapter Cable – 8 Feet
- USB Mic (Movo M1 USB Lavalier Lapel Clip-on Omnidirectional Condenser Computer Microphone for PC and Mac (20′ Cord))
- Headphones connected with a Dual 3.5mm jack from Insignia.
Gone are the days of sitting in a studio. You want to have a podcast rig setup that can move along with you no matter where you do your show.
We were inspired by Rode as we were trying to figure out how to make our rig compatible for shooting video as well as recording the podcast. We now have a mobile audio rig that runs off two Mophie power banks so we can host an episode anywhere, like LegoLand.
Podcasting is ever changing just like the rest of the digital world. However, take the time to read up and learn the best practices because it is brutal to draw straws in this game! Come back and check out our next piece on Podcast Production.


